


Missouri is a great place to fish, and fly-fishing provides unique opportunities to pursue a wide variety of species.
A pivotal part of fly-fishing is selecting the right fly. There is a seemingly endless selection of fly patterns and materials at your disposal. It’s almost overwhelming. But the good news is tying flies is easy, it’s fun, and with a little practice, you will quickly have a collection of unique, customized fishable lures.
Before We Get Started
- Get a basic set of fly-tying tools — vice scissors, whip finisher, bobbin, and hackle pliers. A boxed set, as pictured, provides all the tools necessary.
- Identify a few fly patterns that you would like to start tying and obtain the materials.
- Take a fly-tying class or watch some videos.
- Tying flies is basically a series of repetitive motions, endless variations are possible based upon size and materials.
- Practice new patterns a few times, and after a few attempts, flies will start taking shape, and the process will become easier.
The Tools
Hooks have a few parts — the eye, shank, bend, and point. Typically, the hook is secured in the jaws of the vice between the bend and point. Positioning the hook parallel to the table is preferred, the shank of the hook where most of the work will be done is flat.
To secure the thread to the hook, with a threaded bobbin, make a few wraps of thread around the shank of the hook towards the eye, then wrap the thread back over these wraps and tag the end toward the bend of the hook. Once secured, remove the remaining tag end. Practice this a few times before adding any materials.
Basic fly-tying kits will most likely have both a half hitch tool and a whip finisher. These are used when finishing a fly by tying a tight knot near the eye of the hook. Once you are comfortable with securing thread to the hook, and before adding any materials, practice with the half hitch and whip finishing tools. The whip finishing tool will take a little practice, watching a short video on how to use it will help with the learning curve.
Patterns
Here are fly patterns that will provide you the opportunity to use the tools and materials and practice the repetitive motion used to create flies.
Foam Spider
Materials:
- Hook
- Rubber Band
- Foam Body
- Thread
- Secure the thread to the hook and wrap a thread base down the shank of the hook. Working on top of a thread base will help secure materials to the hook.
- Toward the middle of the hook, place the foam body on top and secure it with several wraps of thread. As you are wrapping, increase the tension to tighten the foam body down. Lifting the back of the body, put a few wraps underneath to prevent the body from sliding down the hook.
- Once the body is secured to the hook, place one or two rubber legs along the right side of the foam body and secure them with the thread. Repeat, securing rubber legs to the left side of the foam body.
- Lifting the front of the foam body, place a few thread wraps underneath, wrapping to the eye of the hook. Using either the half hitch or whip finishing tool, tightly secure the finish knot and cut the thread.
Zebra Midge
Materials:
- Hook
- Bead
- Wire
- Thread
- Thread the point of the hook through the bead and slide the bead up to the eye of the hook.
- Secure the thread to the hook and wrap back towards the bend. Wrapping the thread partially around the bend place the wire on the top of the hook. Wrap over the wire securing it to the fly.
- Proceed to make several thread wraps from the bend of the hook to the bead, building up a tapered thread body.
- Wrap the wire to the bead with 5–6 uniform wraps giving the fly segmentation. Secure the wire at the bead with a few thread wraps and cut the excess wire.
- Using the thread attach a peacock herl just behind the bead. Wrap the herl 3-4 times creating a small collar behind the bead. Secure the peacock herl with the thread and remove the excess.
- Using either the half hitch or whip finishing tool tightly secure the finish knot and cut the thread.
Crackleback
Materials:
- Hook
- Hackle
- Peacock Herl
- Yarn
- Thread
- Secure the thread to the hook and wrap a thread base down the shank of the hook. Working on top of a thread base will help secure materials to the hook.
- At the back of the shank, secure the peacock herl with a few wraps of thread, then add the yarn and hackle, each with a few thread wraps.
- Wrap the thread to the eye of the hook, then wrap the yarn to the eye of the hook and secure it with a few thread wraps.
- Lay the peacock herl across the top of the shank and secure it at the eye with a few thread wraps. Do not wrap the peacock around the hook shank.
- Wrap the hackle using uniform spacing to the eye of the hook and secure it with a few thread wraps.
- Using either the half hitch or whip finishing tool, tightly secure the finish knot and cut the thread.
Elk Hair Caddis
Materials:
- Hook
- Hackle
- Dubbing
- Elk Hair
- Thread
- Secure the thread to the hook and wrap a thread base down the shank of the hook. Working on top of a thread base will help secure materials to the hook.
- At the back of the shank, secure the hackle with a few thread wraps.
- Pull a small amount of dubbing out and twist it onto the thread, making a thin “noodle.”
- Wrap the thread and dubbing two-thirds of the way up the hook shank toward the eye.
- Wrap the hackle with uniform spacing 4–5 times over the thread/dubbing body to provide segmentation. Wrap the hackle with a few thread wraps and cut off the excess.
- Cut 8–10 strands of elk hair and insert the uncut ends down into the hair stacker. Tap the stacker a few times to line up the fibers.
- Remove the hair from the stacker and secure it to the top of hook shank. The fine uncut ends should just extend over the back of the hook. Using loose wraps and progressively getting tighter will help secure the hair.
- Creating a small head, cut the ends of the hair in front of the hook eye.
- Using either the half hitch or whip finishing tool, tightly secure the finish knot and cut the thread.
Woolly Bugger
Materials:
- Hook
- Marabou
- Hackle
- Chenille/Yarn
- Thread
- Secure the thread to the hook and wrap a thread base down the shank of the hook. Working on top of a thread base will help secure materials to the hook.
- Creating a tail, lay a marabou feather on top of the shank extending past the hook bend. The tail should be the same length as the hook shank. Secure it with wraps of thread.
- Secure the hackle with a few wraps of thread, then repeat the process securing the yarn/chenille.
- Wrap the thread to the eye of the hook, then wrap the yarn/chenille toward the hook eye and secure it with thread and cut off the excess.
- Wrap the hackle with uniform spacing towards the eye of the hook, secure it with thread and cut off the excess.
- Using either the half hitch or whip finishing tool, tightly secure the finish knot and cut the thread.
Fly tying can be another tool in your tackle box and empower you to catch more fish. It can also keep you engaged in fishing during the off season. You can use the long winter months to research new patterns, experiment with your own creations, and collect natural materials from the wild, like feathers and fur, to use on your next lure.
Fly tying elevates your game


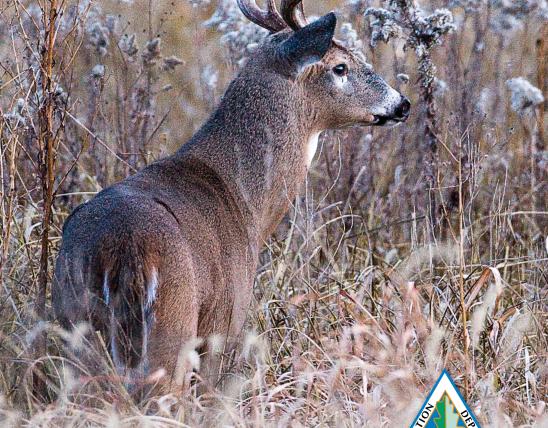
Also In This Issue

Bringing your harvest from the field to your fork
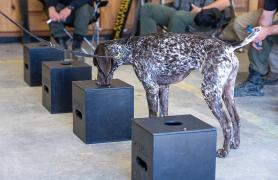
MDC’s K-9 Unit Blazes a New Trail
And More...
This Issue's Staff
Stephanie Thurber
EDITOR
Angie Daly Morfeld
ASSOCIATE EDITOR
Larry Archer
PHOTOGRAPHY EDITOR
Cliff White
STAFF WRITERS
Dianne Van Dien
Kristie Hilgedick
Joe Jerek
DESIGNERS
Shawn Carey
Marci Porter
PHOTOGRAPHERS
Noppadol Paothong
David Stonner
CIRCULATION MANAGER
Laura Scheuler